SnapDrive application Introduction, Installation and configuration – Part-1
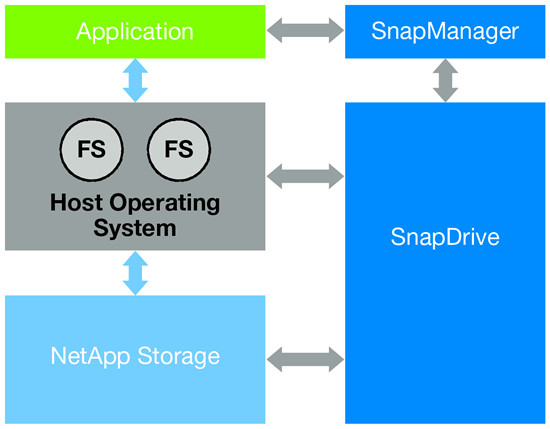
Netapp snapdrive automate storage provisioning tasks. Back up and restore business-critical data in seconds with integrated NetApp Snapshot technology. Add more storage as needed to your physical and virtual environments and eliminate the need to preallocate storage resources based on forecasted demand.
SnapDrive:
- Provides continuous data access across frameworks
- Enables server administrators to self-manage data
- Improves efficiency by automating provisioning
- Leverages the advanced capabilities of the NetApp clustered Data ONTAP operating system
- Enhances data reliability through rapid file system- and application-consistent backup and restore functions and disaster recovery
SnapDrive can be used in multiple platform such as Linux, Unix, AIX and windows platforms Now we are going to see the installation of snapdrive in windows
Prerequisites:
- Windows Operating system 2008, 2008-R2 and 2012 is required
- .Net frame work 3.5 OR 4.0 is required
- Install DSM 4.0 OR above
- Windows Hotfixes are required before you install the SnapDrive For windows 2012 install – HotFix 2859162. If it is 2008 and 2008-R2 install Hotfixes 2522766, 2528357, 2494016, 2520235, 2531907, 974930
- Install PowerShell 2.0 Or above
- Install Netapp windows host utilities kit 6.0.2 or above
- Create service account with required privileges to execute commands in Filers
Additional licenses you can enable on your storage system
- iSCSI, Fibre Channel, Fibre Channel over Ethernet, or Virtual Fibre Channel
- SnapRestore (required for restore operations)
- SnapMirror
- FlexClone (required for persistent mount operations)
- SnapVault
- MultiStore
- SnapManager products
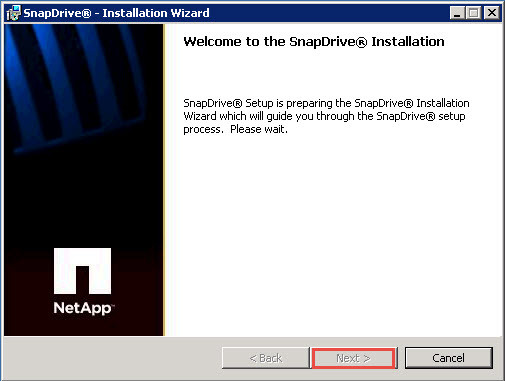
Now download the SnapDrive application from Netapp Support site, Double click on setup file
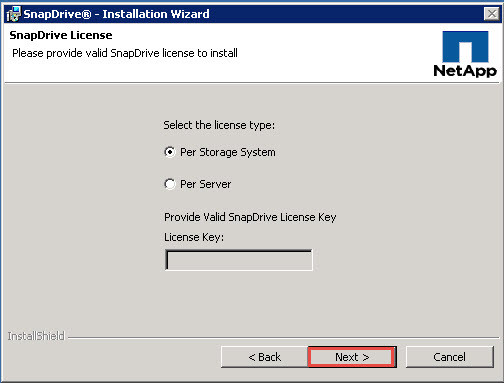
- Storage system licensing enables you to execute SnapDrive operations only on a storage system that has the SnapDrive license installed.
- Host-side licensing enables you to execute SnapDrive on any SnapDrive instance on your host system.
select the option as you license permits Click Next
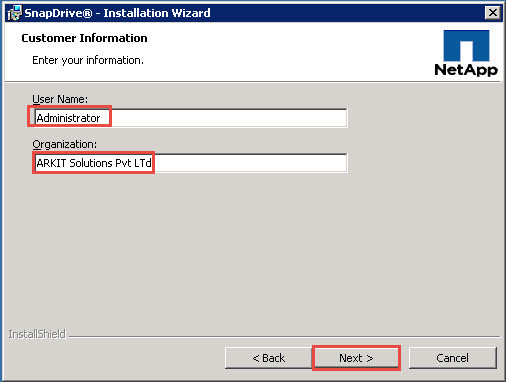 Provide your user name and organization details and Click Next
 If the server you are installing SnapDrive on is a virtual machine which is part of Vmware vCenter and you wish to use the Fiber Channel HBA’s or iSCSI initiators from the ESX hosts, click Enable VirtualCenter or ESX Server Settings and enter in the IP address, user name (with admin rights on vcenter) and password. If the server you’re installing SnapDrive on is a physical machine, don’t Enable VirtualCenter integration and just Click Next.
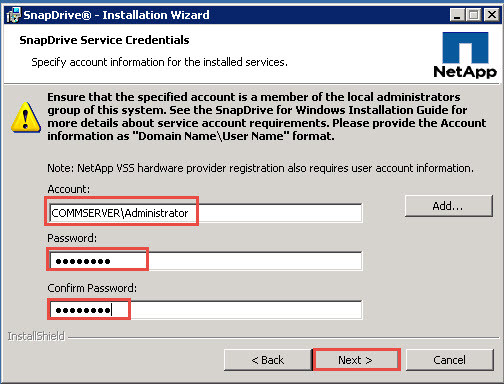 here you have to provide your SERVICE ACCOUNT details and password. Then Click Next
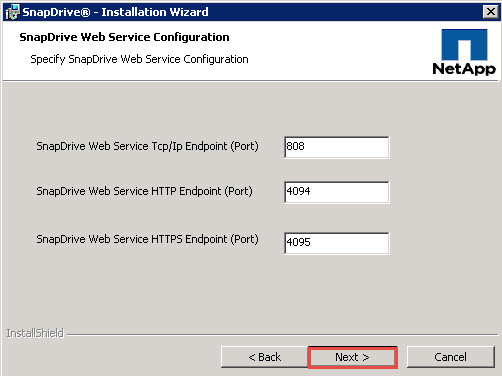 leave the ports as default and Click Next
 Enter the details of your Netapp filer Click Next
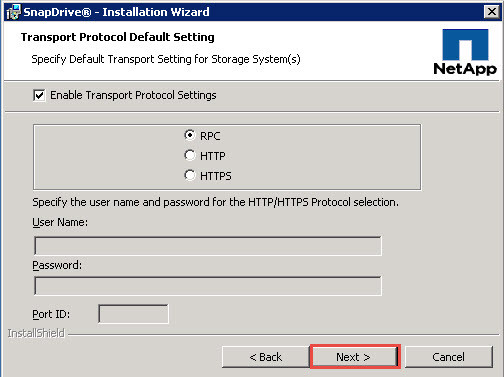 Note: if you want to define perticular protocol then select OR else leave as it is and Click Next
Done..!! your SnapDrive application as been installed successfully.
Thanks for your wonderful Support and Encouragement
- Get Email | Download E-Books
- Facebook Page
- Youtube Channel
- Exclusive Telegram Group
- Discuss On WhatsApp Group


excellent it is very helpful for me.
I was able to find good info from your content.
Excellent notes.