HowTo Migrate Netapp CIFS Shares Associated Volume Steps
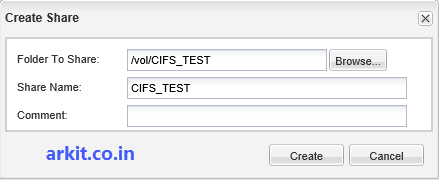
Migrating CIFS shares and associated volume in Netapp Cluster Mode is such an easy all you need is to move volume from one aggregate to another aggregate, associated LIF will still access CIFS Shares. We are not going to talk about cluster mode. In this article, we are going to see HowTo Migrate Netapp CIFS Shares Associate Volume Step By Step Guide.
Migrate Netapp CIFS Shares steps
- Replicate Data from current volume to New Volume (either Use Snapmirror Or Vol Copy)
- Terminate Particular Volume CIFS Sessions
- Run Final Snapmirror Update
- Quiesce snapmirror & Break Snapmirror
- Copy CIFS Configuration File from ETC$ path (cifsconfig_share.cfg)
- Rename Old Volume to different name & Make it Offline (To Free Up Volume Name)
- Rename New Volume with old volume Name
- Replace CIFS configuration file \\FilerName\ETC$\cifsconfig_share.cfg
- Stop and Start CIFS Service
Here there are two methods we can use to migrate CIFS shares. One is restarting the CIFS service which will affect all the CIFS shares which are hosted in the same controller. Another method is to stop and start only particular shares created using a particular volume.
Terminate Particular volume shares
NetappFiler> cifs terminate -t 0 -v CIFS_TEST
Share CIFS_TEST disabled until cifs reactivated for volume CIFS_TEST
The above command will terminate all CIFS shares of a particular volume. Now Update and Break snapmirror relationship.
NetappFiler> snapmirror quiesce CIFS_TEST1
NetappFiler> snapmirror break CIFS_TEST1
Take Configuration file backup before renaming volume. \\NetappFiler\ETC$
Now between Old and New volume data replication is break, Destination volume is writable
> vol rename CIFS_TEST CIFSTESTold
> vol offline CIFSTESTold
The current CIFS hosted volume is renamed
Note: When you rename CIFS hosted volume automatically configuration file will change its mount point name from CIFS_TEST to CIFSTESTold
vol rename CIFS_TEST1 CIFS_TEST
New volume (CIFS_TEST1) has been renamed with Old volume name (CIFS_TEST), It’s time to replace the configuration file by accessing \\NetappFiler\ETC$
Again start CIFS Service after 1 minute of time gap
That’s it Your CIFS Shares are completely migrated from the OLD volume to NEW Volume.
If don’t want to disturb other CIFS shares from accessing data you have to eliminate step replacing configuration file, manually stop CIFS shares one by one and re-create them
That’s all about migrate Netapp CIFS shares from one volume to another volume.
Related Articles
Easy Way to Collect Perfstat data
HowTo Renew SSL Certificate C-Mode
Snapmirror Config from scratch
Thanks for your wonderful Support and Encouragement
- Get Email | Download E-Books
- Facebook Page
- Youtube Channel
- Exclusive Telegram Group
- Discuss On WhatsApp Group


Hi Ravi,
The article is really very good. If you have steps for CDOT or 7 mode data migration to NETAPP CVO.
Hi Naik, you can use 7MTT tool or snapmirror method to migrate in CDOT or 7-Mode.