web server installation and configuration step by step guide
Apache web server installation and configuration step by step guide in RHEL7 and Centos 7. web server is used to host websites using httpd service.
Why Apache name chosen for this software?
This software is chosen a name called APACHE because its firstly group of patches included and used as a software to run we server from native American nations group. Native American people called as Apache men. As shown in figure below he is an Apache men from native American group of people.
Now if you observe carefully above picture he is wearing an CAP with below shown picture that’s where Apache name is confirmed for this software
Prerequisites
- Create DNS entry to resolve you web server name
- Web browser to access the web server
Server profile
- Package Name: httpd*
- Daemon Name: httpd
- Config File: /etc/httpd/conf/httpd.conf, /etc/httpd/conf.d/ANYNAME.conf
- Port Numbers: 80 (HTTP) and 443 (HTTPS)
Web server installation process
# yum install httpd*
required to install httpd and its dependencies
Enable and Start the Service
# systemctl enable httpd.service
ln -s '/usr/lib/systemd/system/httpd.service' '/etc/systemd/system/multi-user.target.wants/httpd.service'
# systemctl start httpd.service
# systemctl status httpd.service
- service enable – which means whenever you restart server, service should automatically enable
- service start – Normally starting service
As per the above commands web server is installed and started
Allow firewall ports to communicate with clients
# firewall-cmd --permanent --add-service=https
success
# firewall-cmd --reload
success
web server ports are 80 and 143 default for HTTP and HTTPS
in RHEL 7 and Centos 7 version instead of port numbers we can directly mention the service which will automatically take its related default port
if you would like to mention the port use below commands
# firewall-cmd --permanent --add-port=443/tcp
success
# firewall-cmd --reload
success
Configuring the web server
create a file with any name extension should be .conf under /etc/httpd/conf.d/*.conf
in this case I am going to use main.conf is the configuration file
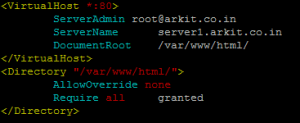
# cat /etc/httpd/conf.d/main.conf
<VirtualHost *:80>
 ServerAdmin root@arkit.co.in
 ServerName server1.arkit.co.in
 DocumentRoot /var/www/html/
</VirtualHost>
<Directory "/var/www/html/">
 AllowOverride none
 Require all granted
</Directory>
# vim /etc/httpd/conf.d/main.conf
# systemctl restart httpd.service
# systemctl status httpd.service
Check configuration if you run with any problems
# apachectl configtest
Syntax OK
Create HTML file for test
Go to path /var/www/html/ and create index.html file and write some HTML code or some text test your website
# cat /var/www/html/index.html
Web Server Test File
Client side
Web server testing, as you created above test file with some text in it. Now go to client machine and type server IP / Name to test your web server is working or not
That’s it about Apache / HTTP service installation and configuration.
Please provide your valuable feedback on the same
Web server installation and configuration
Securing Web Server by adding SSL certificate
Creating Secret Website Installation and configuration Guide
Thanks for your wonderful Support and Encouragement
- Get Email | Download E-Books
- Facebook Page
- Youtube Channel
- Exclusive Telegram Group
- Discuss On WhatsApp Group


https port is 443 not 143…
[root@ArkIT ~]# firewall-cmd –permanent –add-port=143/tcp
success
[root@ArkIT ~]# firewall-cmd –permanent –add-port=143/udp
Thanks for your feedback corrected
Learn linux with Real Practical knowledge