RHEV Hypervisor Installation Step by Step Guide Part-3
This before we posted an post about RHEV-M (Red Hat Enterprise Virtualization Manager) Here is an Continuation post for Installing Red Hat Enterprise Hypervisor Host. Manager is used to manage multiple RHEVH (Red Hat Hypervisor Hosts). In this article we are going to see HowTo Install RHEV Hypervisor Installation Step by Step Guide.
Hypervisor we can also install in RHEL versions but installing direct ISO will give to optimized environment and less performance issues. Hypervisor Operating System is fully optimized and runs only required services.
HowTo Install RHEV Manager – Part-2
RHEV Hypervisor Installation
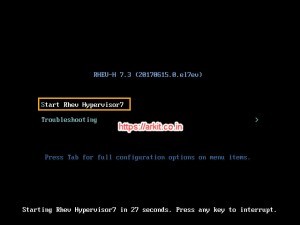
After successful completion of download ISO file. Please write to CD/DVD and try to load and boot from CD/DVD
Select installation Start Rhev Hypervisor 7
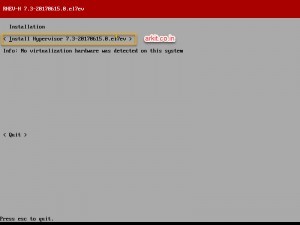
To Continue Installation you have to select “Install Hypervisor 7.3“
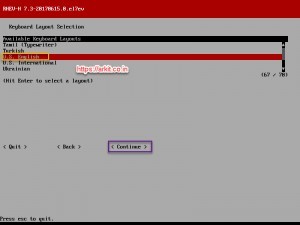
RHEV Hypervisor Installation Select “Key Board Language” and Hit Continue
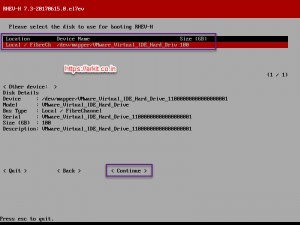
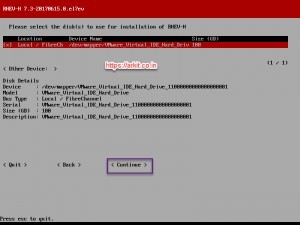
Please Select the Disk to use for Booting RHEV-H then Click Continue
Storage Volumes and there space allocation
- Swap MB : 7960
- Config MB: 5
- Logging MB: 2048
- Data MB: 83531
After partitioning please continue
The Data on these Disks will we erased! – Click Confirm
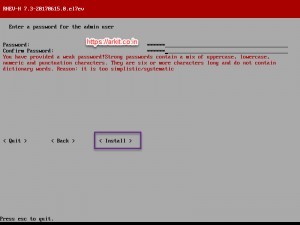
Enter a password for the admin user and confirm password – Click Install
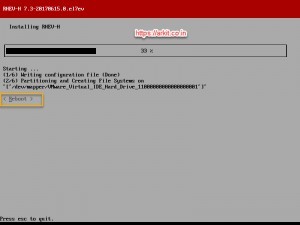
Installation of RHEV Hypervisor is in progress
Configure bonding you have to select bond0 and click Enter
Select Boot protocol Static
- IP Address :
- Netmask :
- Gateway :
Click Save
Adding RHEV Hypervisor to RHEV Manager
Ping to the RHEV-M Host and check your able to reach
If it is reachable then your almost near by
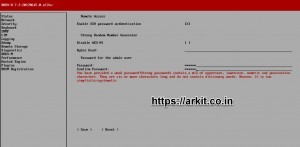
Go to Security Tab and Enable SSH Remote Access which is used to authenticate from RHEVM for adding and changing Host settings from Manager
After enabling the SSH provide password and Hit Save
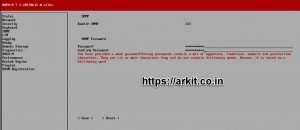
If you have requirement to monitor RHEV-H from monitoring tool enable SNMP
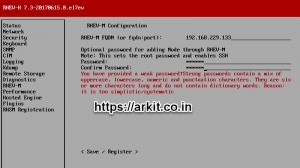
The Final step is to add Host to Manager to do that add RHEV-M details by selecting RHEV-M Tab
RHEV-M FQDN – Provide Fully Qualified Domain Name OR IP Address of Manager
Provide Password for root
Click <Save / Register>
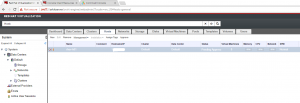
Go Back to Red Hat Enterprise Virtualization Manager and check Host Tab you should see Added Host Pending for approval
Select Appropriate Host and Click Approve to continue
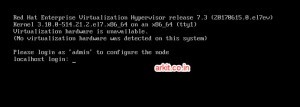
That’s it. RHEV Hypervisor installation completed successfully and also added to RHEV-M Now Next step is to Create Virtual Machines, Adding Storage Domains and Manage Virtual machines from Manager
Related Articles
HowTo Install Kernel-Based Virtual Machine
Thanks for your wonderful Support and Encouragement
- Get Email | Download E-Books
- Facebook Page
- Youtube Channel
- Exclusive Telegram Group
- Discuss On WhatsApp Group






Your branding “https://arkit.co.in” in the middle of the screenshots is a distraction. Suggest that you put it in a less busy part of the screenshots e.g. lower right corner of the images.
Hi Ark, I am not able to download the Hypervisor 7.3. Could you please guide me which iso will work. Please confirm RHVH 4.1 will work as hyper visor. how can i download rhev-m for offline installation.
https://access.redhat.com/products/red-hat-virtualization Download RHEVH 4.1 using this link. If you want offline RHEV-M installation you can do that using one Linux machine in your network should have subscription to Red Hat. https://access.redhat.com/documentation/en-us/red_hat_virtualization/4.1/html/installation_guide/configuring_an_offline_repository_for_red_hat_enterprise_virtualization_manager_installation
Hi Ark, Thanks for your response. i have downloaded the RHEVH 4.1. But as per given instruction the process of installation is different. you have installed the RHEV-H 7.3 hypervisor in which you are able to login from admin or able to configure all the stuff. in 4.1 Hyper visor you get different look. i am bit confuse here. please guide me.
Hi Ajit, Just look at my post i have published how to add RHEVH 4.1 into RHEVM. its so simple login to RHEVH http://RHEVH-IP:9090 https://arkit.co.in/rhev-h-4-1-installation-step-by-step/ To add to RHEVM just login to RHEVM web console –>hosts–> add host provide details.