setting up Linux Lab – Red Hat Enterprise Linux 7 installation
setting up Linux Lab – Red Hat Enterprise Linux 7 installation
To setup up Linux Lab we have to start installing an Red Hat Enterprise Linux 7.2 is a latest version, for our lab we does not required to install GUI in main server, we just install minimal installation. setting up Linux Lab – Red Hat Enterprise Linux 7 installation
Before going to install an OS let’s see few improvements in Red Hat Enterprise Linux 7.2
- Cross channel package dependancy improvements
- Yum has been enhanced to prompt the end user to search disabled package repositories
- RELRO protection now properly applied when requested. Relocation read only (RELRO)
- More diagnostic information and a renamed plug-in for sosreport
- Enable virtio network device renaming
- Support for DIF/DIX (T10 PI) on specified hardware
- Identity Management sets up a one-way trust by default
- Openldap rebase to version 2.4.40
- Cache authentication in SSSD
- SSSD enables UID and GID mapping on individual clients
- SSSD can now deny SSH access to locked accounts
- The sudo utility now capable of verifying command checksum
- SSSD smart card support
- Support for multiple certificate profiles and user certificates
- Password Vault
- Kerberos HTTPS proxy in Identity Management
- Background refresh of cached entries
- Caching for initgroups operations
- Automated migration from WinSync to trusts now supported
- Multi-step prompting for one-time and long-term passwords
- Multiple CPU support in kdump on AMD64 and Intel 64 systems
- Dynamic kernel updates with kpatch
- SELinux policy for Red Hat Gluster Storage has been added
- GSSAPI key-exchange algorithms can now be selectively disabled
- Btrfs file system
The Btrfs (B-Tree) file system is supported as a Technology Preview in Red Hat Enterprise Linux 7.2. This file system offers advanced management, reliability, and scalability features. It enables users to create snapshots, it enables compression and integrated device management.
Let’s begin the installation process.
Step 1: Boot from CD/DVD (installation media)
after booting from CD/DVD you can see the below screen as shown below
Step 2: Select Install Red Hat Enterprise Linux 7.2
select install Red Hat Enterprise Linux 7.2 and hit enter
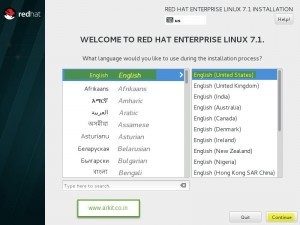
Step 3: Select system Language
as shown in above screen select your own system language, in my this case selected English as my system language setting up Linux Lab – Red Hat Enterprise Linux 7 installation
then Click Continue
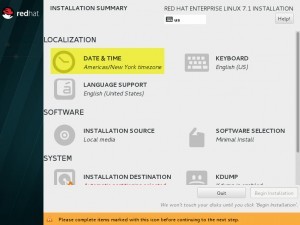
Step 4: Set Date & Time
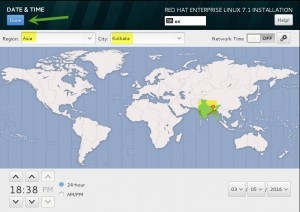
as shown in above screen click on Date & Time and you will redirected to different screen as shown in below
Now select your own time zone and Click on Done
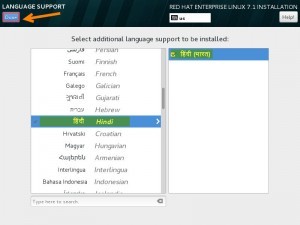
Step 5: Install Extra language as your requirement
Click on Language Support (As shown screen in Step 4) you will redirected to below screen
Select the languages you want to install, After installation you can language
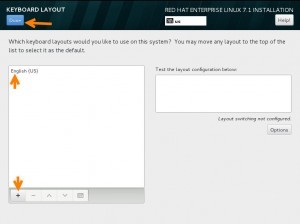
Step 6: KEYBOARD language
keyboard language add your keyboard languages to type, after installation
Step 7: Software Selection
in this step we have to select the packages what you wanted to install while installing Operating system. Select Minimal Install and Click on Done
Note: Do not install GUI we only require “Minimal Install” for our server setup
Step 8: Installation Destination
Click on INSTALLATION DESTINATION (as shown screen in Step 4) you will be redirected to above shown screen
Select “I will configure partitioning” then Select the Disk Click on Done
Now you will again redirect to another screen as shown in below
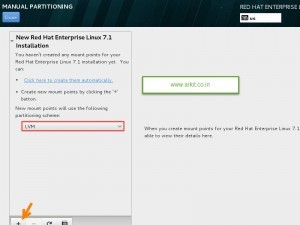
Now select the partition type “Standard Partition” “Btrfs” “LVM” “LVM Thinprovisioned”
In this case we need “LVM” type partitions because it is very flexible to increase and decrease partition sizes
click on “+” symbol to create partitions
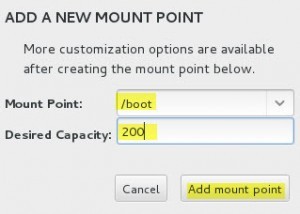
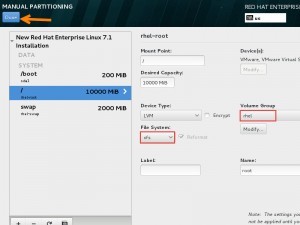
Select Mount point “/boot” provide size 200 MB as default it will take size in MB’s if you want to allocate space in GB’s then add ‘G’ after the value. if you want to add size in TB’s then add ‘T’ after the value
click on “Add mount point”
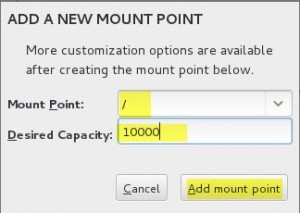
Select Mount point as “/” then provide the size (As per your requirements) in this case provided 10GB
Click on “Add mount point”
in the same as like above steps create swap partition and click on mount point then it looks like below screen, after adding all the partitions
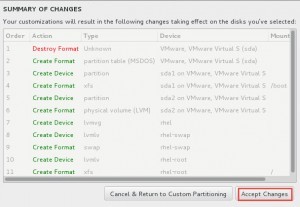
Click on Done then it will ask you for the confirmation as show in below screen
Click on Accept Changes
Step 9: KDUMP Selection
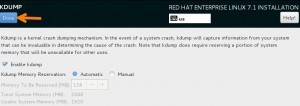
Kdump is a kernel crash dumping mechanism and is very reliable because the crash dump is captured from the context of a freshly booted kernel and not from the context of the crashed kernel. Kdump uses kexec to boot into a second kernel whenever system crashes.
Click on KDUMP (as shown in screen @ Step 4)
if you want to enable KDUMP then click on Enable kdump
Click on Done
Step 10: Configure your Network
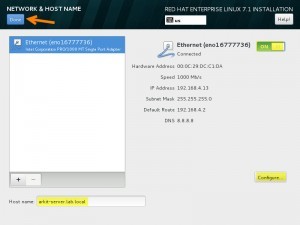
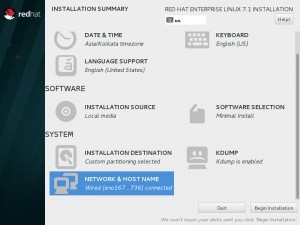
click on NETWORK & HOST NAME
As shown in above screen type your Host Name with fully qualified domain name. Click on ON button.
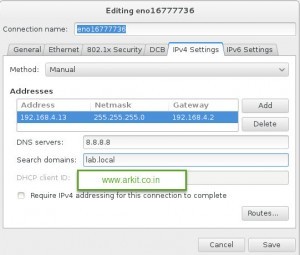
Click on Configure button you will be redirected to different screen as shown below
Now go to IPV4 Settings and select Method Manual
Add IP Address, Gateway, Subnet Mask and DNS Server IP Address then Click on Save
then Click on Done
Now Click on Begin Installation
Step 11: Set root user password and Create another Administrator user
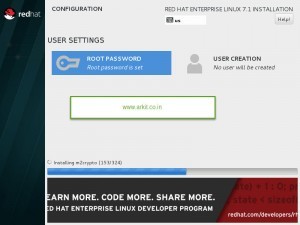
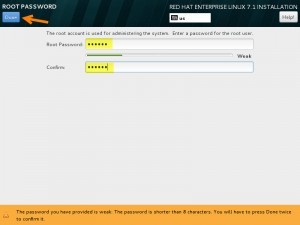
Click on ROOT PASSWORD
Here set your root user password then click on Done
Password must be 8 characters, One Capital letter, one Special character and one number, combination of all this become a strong password.
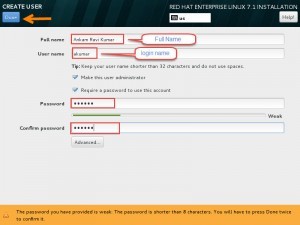
If you give an weak password you have to click on Done two times
click on User Creation you will see below screen
please provide the details as shown in above screen then click Done
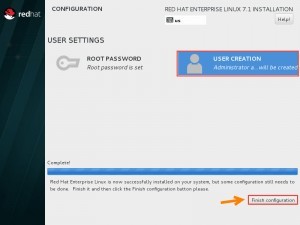
Wait for the installation to complete (it will take 30 to 45 minutes based on your package selection).
click on Finish Configuration
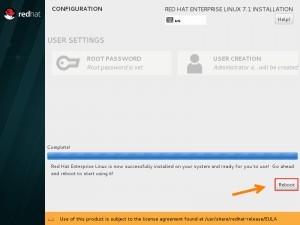
Step 12: Reboot after completion of installation
After completion of installation it will prompt you to reboot, click on reboot
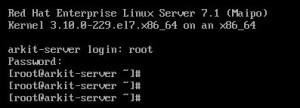
congratulations you have successfully installed Red Hat Enterprise Linux 7.2
Please do comment your feedback on the same article
setting up Linux Lab – Red Hat Enterprise Linux 7 installation setting up Linux Lab – Red Hat Enterprise Linux 7 installation
Setting up Linux Lab Related Posts
- Installing VMWare workstation Software
- Creating Virtual Machines
- Setting up Virtual Network environment
- Red Hat Linux Installation
Thanks for your wonderful Support and Encouragement
- Get Email | Download E-Books
- Facebook Page
- Youtube Channel
- Exclusive Telegram Group
- Discuss On WhatsApp Group

