vCenter server installation and configuration guide
in Previous article we see how to install and configure ESXi server. In this Tutorial we are going to see vCenter server installation and configuration and integrate ESXi server with vCenter server.
Why vCenter server installation
Assume we have 10 ESXi servers installed with vmware ESXi, if you want to create a VM an ESXi one server then you have to login to ESXi one server and Create VM in the same if you want to create an VM in any one of the ESXi host then login to each box and create VM’s and manage VM’s. Think if you have an 20 to 30 ESXi hosts and more than 200 VM’s in them its very difficult to manage.
That’s where vCenter server is very handy to manage multiple ESXi servers and It’s VM’s from one console.
Minimum Hardware and Software Requirements
- 64-bit windows 2008 R2 server is required
- 8 GB RAM
- 20 GB of Hard Disk space on windows server
- 2 Core CPU
- One Service Account
vCenter server installation process
Download vCenter Server ISO image and burn into the DVD Or Make bootable pen drive
- Insert the DVD into DVD drive to install vCenter server 6.0
- Right click on DVD drive then click on “Install or Run program” (OR) Open the DVD and run the “autorun.exe” file
- After running the program vmware vCenter installer console will be opened
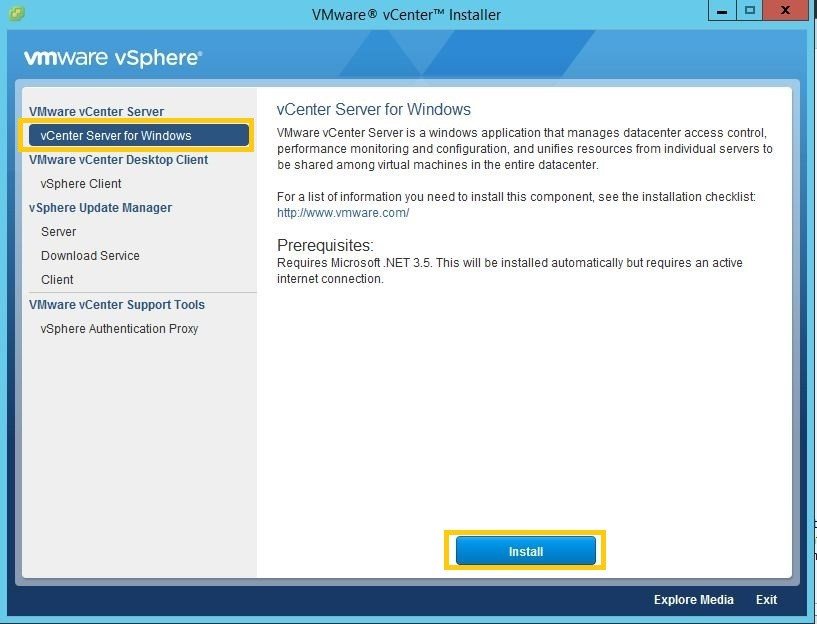
- On vmware vCenter installer windows →Select the “vCenter Server for Windows” object under the “vmware vCenter server” option. Click on “Install” button
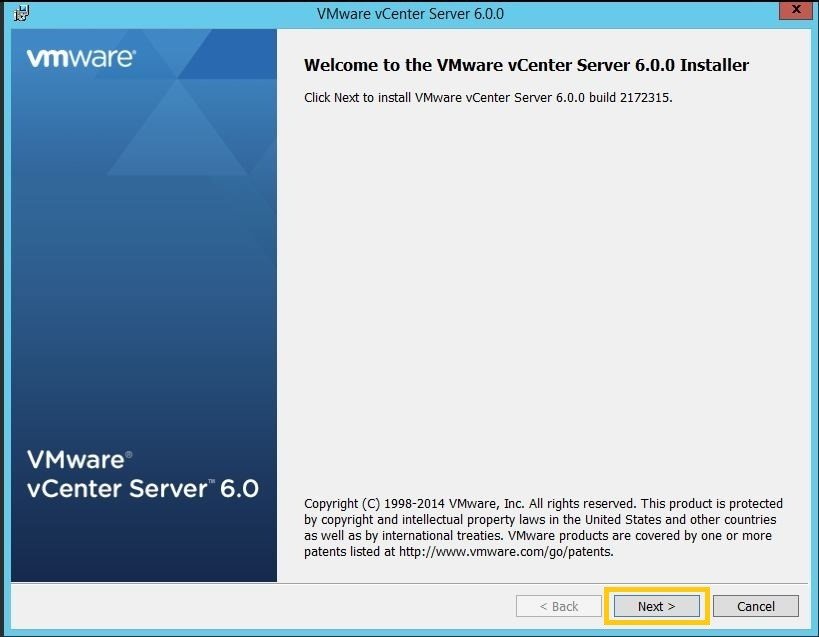
- on “welcome to the vmware vCenter server 6.0 Installer” window, click on “Next” to continue
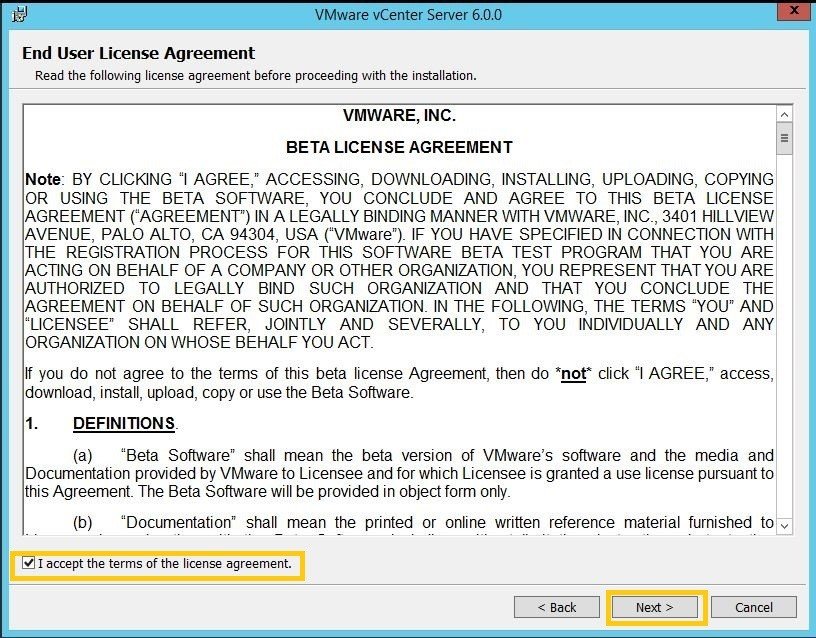
Accept License agreement and click Next to continue
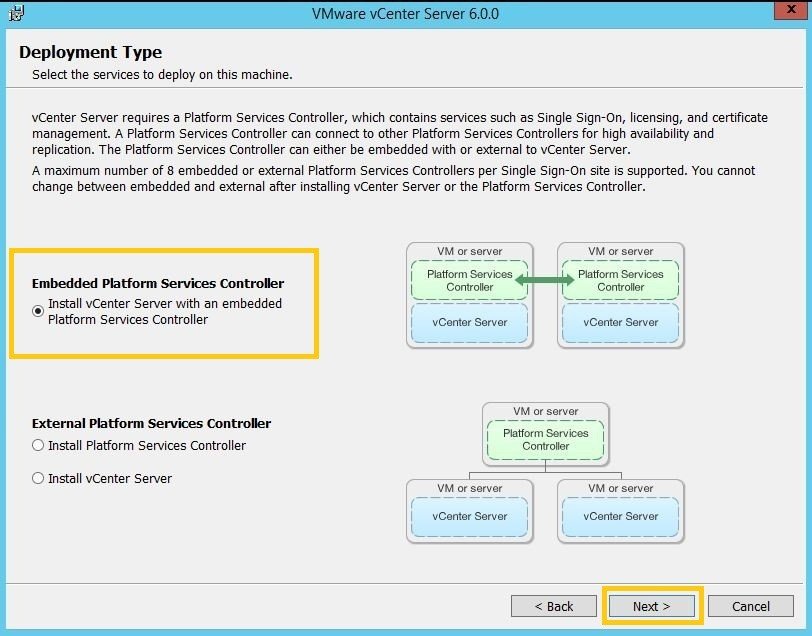
select “Install vCenter Server with an embedded Platform Services Controller”
click Next
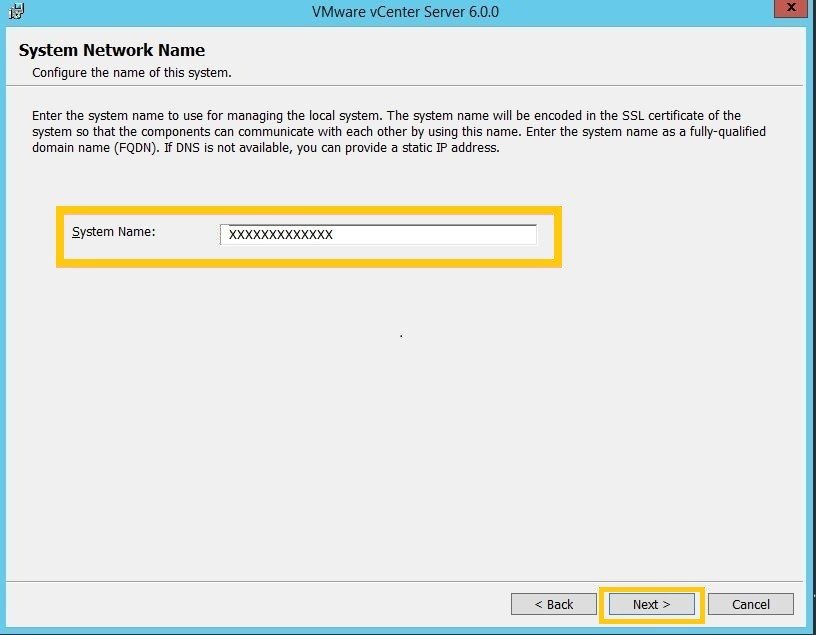
Enter your host name and click Next
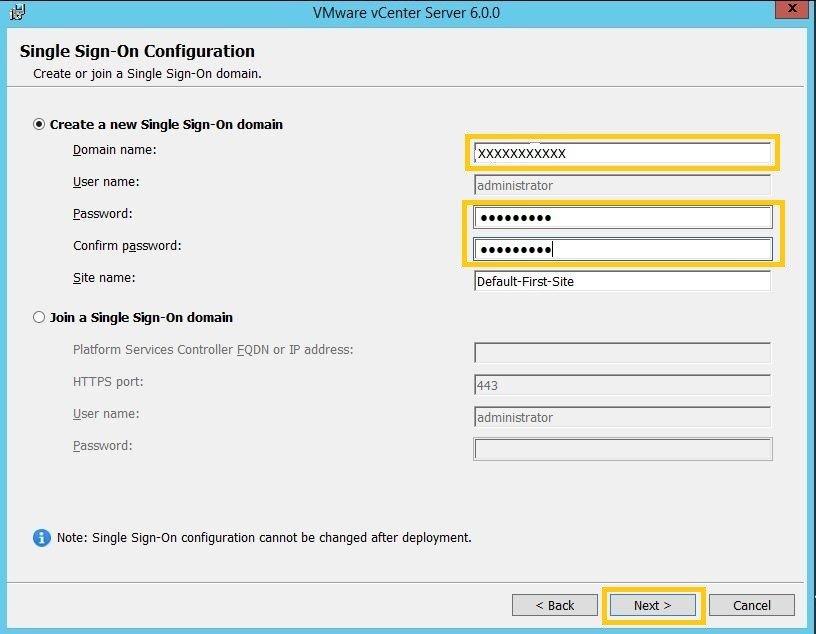
To enable single-sign on option provide your domain name Administrator Credentials then click Next

If you have an Domain service account credentials then enter the service account details. You can also use local administrator account to authenticate
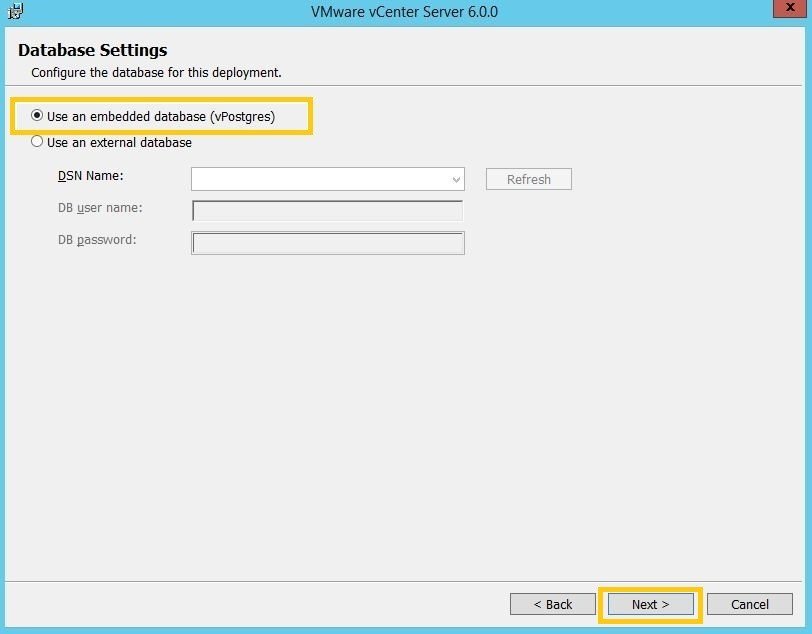
Use an Embedded Database then click Next
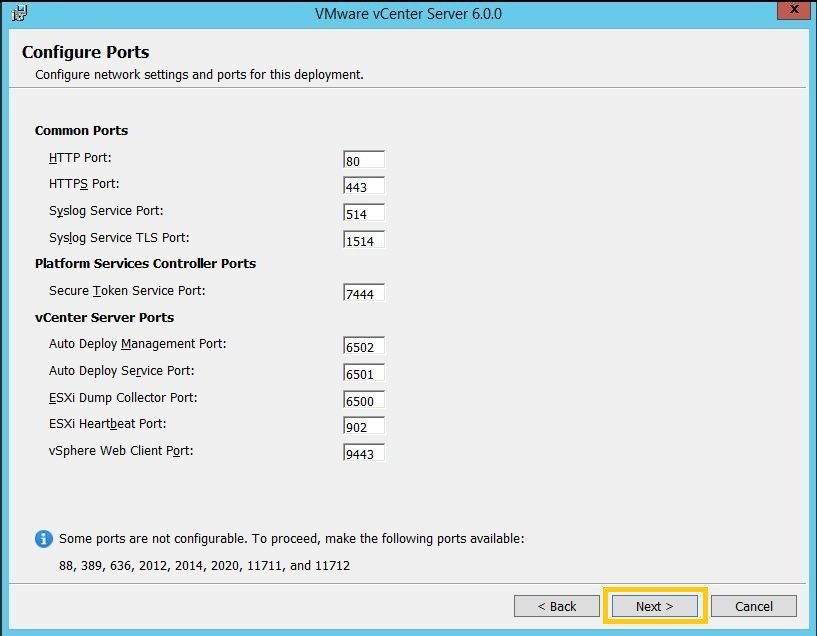
Leave the default port numbers (Do not change any port number) click Next

Select Destination Folder to install vCenter files (if you want to change / install vcenter application in other than C Drive then change location by clicking on Change button)
click Next
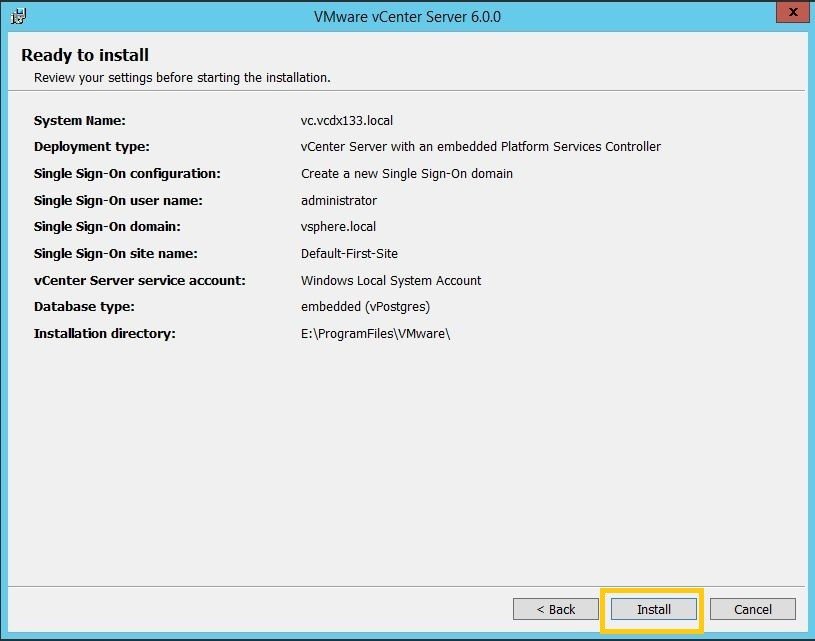
Now verify all the Detail what you have selected in above steps If all correct then click Install

Installation is in progress
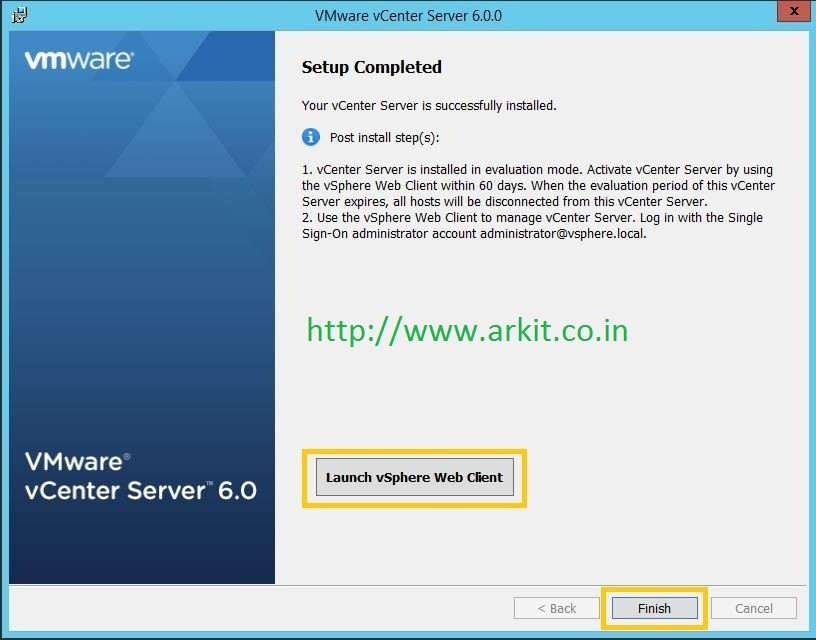
Click on Launch vSphere web client then Click Finish
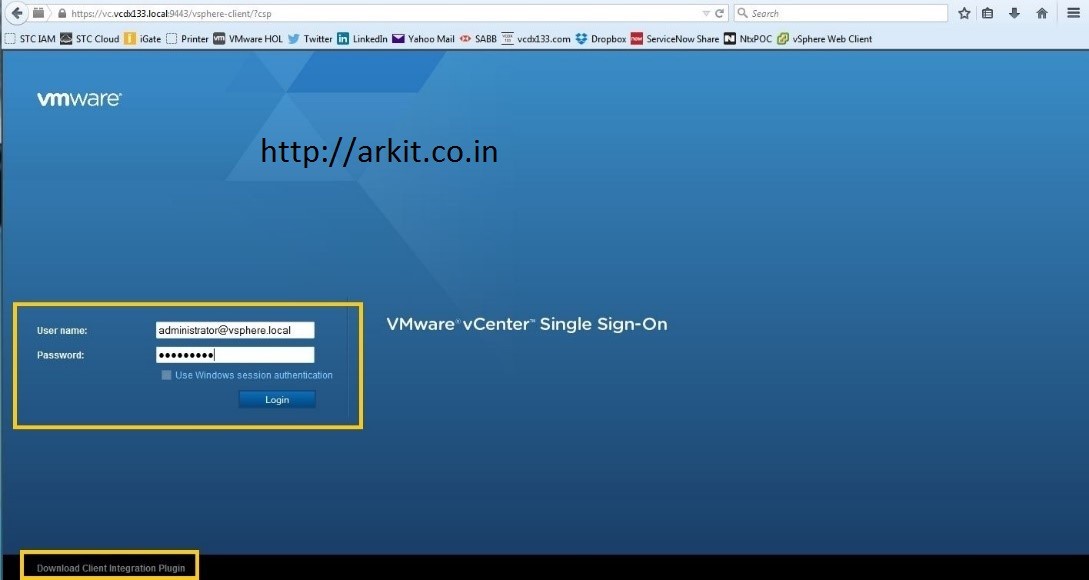
Provide Service Account credentials to login to web client
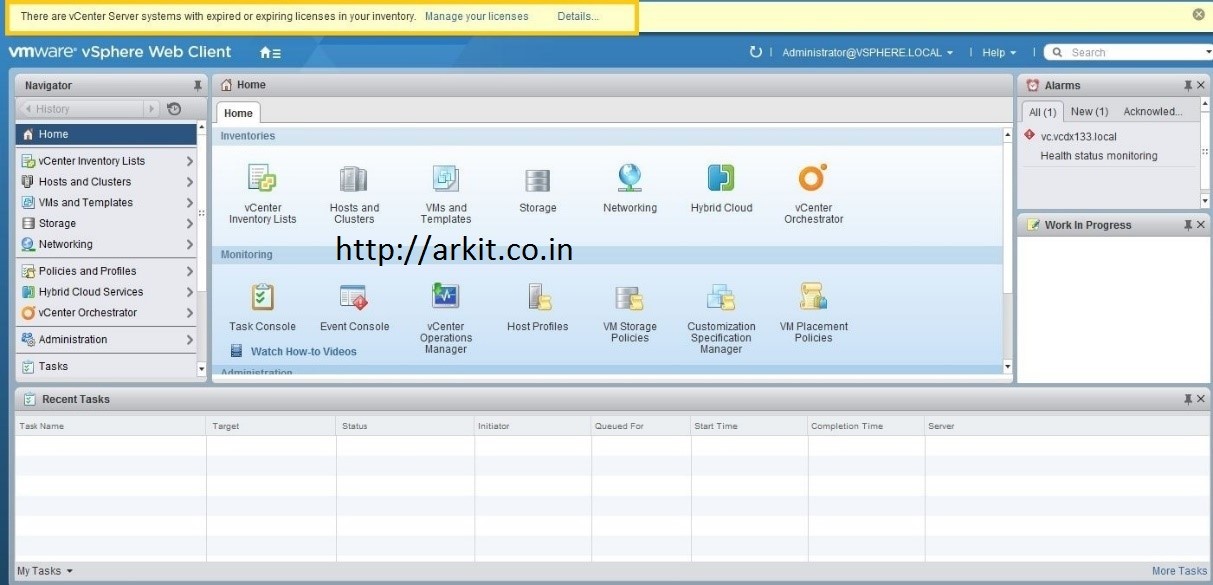
After successfulll installation of vCenter web client above is the first screen which will appear
That’s it. vCenter Server installation and configuration completed
Please do comment your feedback.
Thanks for your wonderful Support and Encouragement