MRTG Installation and Configuration RHEL7 Step by Step Guide
MRTG – Multi Router Traffic Grapher Open Source tool to monitor any device interface bandwidth with easy steps. In this post i am going to show you. How to Install and configure MRTG installation in Red Hat Enterprise Linux 7 Version step by Step Guide.
Basically this tool is used to monitor interface bandwidth on devices, its simply generates PNG images with HTML support which are LIVE visualization of interface usage. Most useful when you do not have any monitoring tool in hand this open source can help you.
MRTG Installation Prerequisites
- Apache web server installation
- SNMP installation and configuration in Server and client
- MRTG package installation and configuration
Get remote server/device interface traffic details by querying SNMP MIB data. In-Order to get remote device details you have to enable SNMP service in server and configure community string in client machine.
Environment
- Server IP: 192.168.2.5
- Client (Router IP): 192.168.2.10
- SNMP Community String: ArkIT
Install required packages using yum utility command is below
# yum -y install net-snmp net-snmp-utils mrtg httpd
Configure SNMP
This SNMP Configuration will be carried out in Linux server and client device as well.
Login to router Configure SNMP
>enable
Password:

Router# config t

Router(config)#
Router(config)# snmp-server community ArkIT RO

Router(config)#exit

Router#write memory
Building configuration...
[OK]
Linux Server SNMP configuration
# cp /etc/snmp/snmpd.conf /etc/snmp/snmpd.conf.bak
# rm -rf /etc/snmp/snmpd.conf
# vi /etc/snmp/snmpd.conf

###### Copy and Paste below config lines #####
rocommunity ArkIT localhost
rocommunity ArkIT 192.168.2.5

# Allow Systems Management Data Engine SNMP to connect to snmpd using SMUX
smuxpeer .1.3.6.1.4.1.674.10892.1
##### Done ####
Start and enable SNMP service
# systemctl start snmpd.service
# systemctl enable snmpd.service
Verify SNMP is working or not using snmpwalk command
# snmpwalk -v2c -c ArkIT 192.168.2.10 system
cfgmaker Configuration Generator
Generate mrtg configuration file using cfgmaker command, if you want monitor multiple devices generate multiple configuration files one file for one device
# cfgmaker --snmp-options=:::::2 --ifref=descr ifdesc=descr ArkIT@192.168.2.10 > /etc/mrtg/router.cfg
By using above command will scan remote router device and its available interfaces, generates the configuration file to /etc/mrtg/router.cfg. Now edit the config file and UN-comment Workdir and change the path (if you want to change to another path) and also UN-comment Options if you want graph data in bits instead of bytes
Workdir: /var/www/html/mrtgOptions[_]: growright, bits
Now check config file is working as expected, below command will run in loop and generate all the html files and PNG files in Work directory location
# for ((i=1; i <= 3; i++ )); do env LANG=C mrtg /etc/mrtg/router.cfg; done
Creates index files for mrtg web sites use indexmaker command
# indexmaker --columns=1 /etc/mrtg/router.cfg > /var/www/html/index.html/index.html
Allow/Deny Web Page
# vi /etc/http/conf.d/mrtg.conf

Alias /mrtg /var/www/html/mrtg

<Location /mrtg>
Order deny,allow
Deny from all
Allow from 127.0.0.1
Allow from 192.168.2.0/24
</Location>
As per the above rule you can only access web page from 192.168.2.x IP addresses, if you want to allow all other networks to access web page specify ‘ALL’ instead of IP address/Net-mask value
Add Firewall Rule
# firewall-cmd --permanent --add-service=snmp#firewall-cmd --permanent --add-service=http# firewall-cmd --reload
Change permissions to allow web browsing
# chown -R apache:  /var/www/html/
# systemctl restart httpd
Schedule data collection using crontab
# crontab -e
*/5 * * * * env LANG=C LC_ALL=C /usr/bin/mrtg /etc/mrtg/router.cfg --lock-file /var/lock/mrtg/mrtg_a --confcache-file /var/lib/mrtg/mrtg.ok
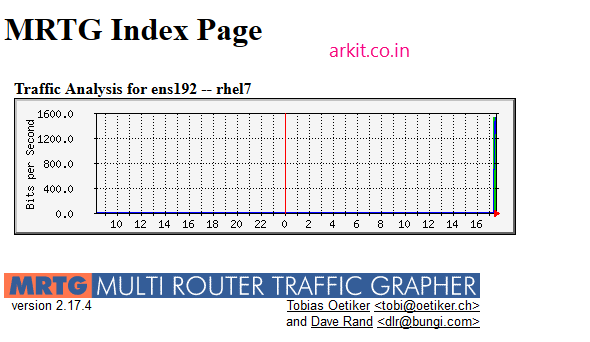
mrtg installation rhel7
That’s it about configuring mrtg in RHEL7 / Centos7.
Conclusion:
If you would like to configure multiple routers/Devices to monitor via this tool generate multiple configuration files using device names as config file names
Configuration file
cat /etc/mrtg/router.cfg

# Created by
# /bin/cfgmaker --snmp-options=:::::2 --ifref=descr ifdesc=descr ArkIT@192.168.2.5


### Global Config Options

# for UNIX
WorkDir: /var/www/html/

# or for NT
# WorkDir: c:\mrtgdata

### Global Defaults

# to get bits instead of bytes and graphs growing to the right
Options[_]: growright, bits

EnableIPv6: no

######################################################################
# System: rhel7
# Description: Linux rhel7 3.10.0-693.21.1.el7.x86_64 #1 SMP Wed Mar 7 19:03:37 UTC 2018 x86_64
# Contact: root@localhost
# Location: Unknown
######################################################################


### Interface 2 >> Descr: 'ens192' | Name: 'ens192' | Ip: '192.168.2.5' | Eth: '00-50-56-82-d9-83' ###

Target[192.168.2.5_ens192]: \ens192:ArkIT@192.168.2.5:::::2
SetEnv[192.168.2.5_ens192]: MRTG_INT_IP="192.168.2.5" MRTG_INT_DESCR="ens192"
MaxBytes[192.168.2.5_ens192]: 1250000000
Title[192.168.2.5_ens192]: Traffic Analysis for ens192 -- rhel7
PageTop[192.168.2.5_ens192]: <h1>Traffic Analysis for ens192 -- rhel7</h1>
<div id="sysdetails">
<table>
<tr>
<td>System:</td>
<td>rhel7 in Unknown</td>
</tr>
<tr>
<td>Maintainer:</td>
<td>root@localhost</td>
</tr>
<tr>
<td>Description:</td>
<td>ens192 </td>
</tr>
<tr>
<td>ifType:</td>
<td>ethernetCsmacd (6)</td>
</tr>
<tr>
<td>ifName:</td>
<td>ens192</td>
</tr>
<tr>
<td>Max Speed:</td>
<td>1250.0 MBytes/s</td>
</tr>
<tr>
<td>Ip:</td>
<td>192.168.2.5 (rhel7)</td>
</tr>
</table>
</div>
Thanks for your wonderful Support and Encouragement
- Get Email | Download E-Books
- Facebook Page
- Youtube Channel
- Exclusive Telegram Group
- Discuss On WhatsApp Group


The configuration I did worked fine but now I don’t know how to add the ip of the new router and how to put the title name in it like I had to add 192.168.4.5
centos 7
#com2sec notConfigUser default public
com2sec local localhost public
com2sec mynetwork 192.168.42.0/24 public
group MyRWGroup v2c local
group MyROGroup v2c mynetwork
view all included .1 80
cd /etc/snmp/
snmpwalk -v2c -c public localhost system
cfgmaker –snmp-options=:::::2 –ifref=descr –ifdesc=descr –global ‘WorkDir: /var/www/html/mymrtg’ public@192.168.42.166 > /etc/mrtg/mrtg.cfg
cd /var/www/html/
mkdir mymrtg
indexmaker –columns=1 /etc/mrtg/mrtg.cfg > /var/www/html/mymrtg/index.html
vi /etc/cron.d/mrtg
*/5 * * * * root LANG=C LC_ALL=C /usr/bin/mrtg /etc/mrtg/mrtg.cfg –lock-file /var/lock/mrtg/mrtg_l –confcache-file /var/lib/mrtg/mrtg.ok
vi /etc/httpd/conf.d/mrtg.conf
Alias /mrtg /var/www/html/mymrtg
Require local
Require ip 192.168.42.166
# Require ip 10.1.2.3
allowoverride all
# Require host example.org
192.168.42.166/mymrtg/